Posts Tagged ‘Highlighting’

Add Highlighting & Conditional Formatting to PivotPoint tables

Date:March 12th, 2014 Author: Tags: , , , , ,
Category: PivotPoint Web Part, SharePoint Ideas Comments:1 ;

Our PivotPoint web part for SharePoint allows you to summarise data from your SharePoint lists in a similar way to Excel’s Pivot Tables and Charts.

A few users have asked how you can add highlighting or conditional formatting to the Pivot Tables – to do things like highlighting the High Risk column, or any cell above a certain value.

We have a Highlighter app that allows you to do this on normal Lists but it doesn’t work with PivotPoint so I thought I would put together some examples of how you can do this using every SharePoint hackers favourite tools – JavaScript and jQuery.

You will need some experience with programming and/or JavaScript to be able to modify these examples to do what you want but there are lots of comments in the code to help.

If you’re looking for an easy way to add conditional formatting/ highlighting for SharePoint Lists then check out Highlighter.

So lets get started. The files you need for the article can be found in a zip file here. Inside you will see a test .html page that can be used just to experiment with the javascript and a .js.txt file that contains the javascript to use on your site.

Adding JavaScript to a page

The first thing we need to know is how to add JavaScript to a page. Read up about that and come back!

In SharePoint 2013 you can add a Script Editor web part (under Media and Content). This blog post walks you through.

For SharePoint 2010 and 2007 you have to use the Content Editor web part (CEWP)

You could use the Source View of the CEWP and put the JavaScript directly into it, but you could also staple your tongue to a door and it will probably be less painful!

A much better way is to save the script as a .txt file in a document library and then include the file on the page with the Content Editors “Content Link” feature. Christophe walks you through this method here.

jQuery or not?

The examples given here use jQuery – a great addition to JavaScript that simplifies many common tasks.

You could adapt these ideas to run without jQuery if you like – but you’re on your own with that!

You can see the reference to jQuery on the first line of the example scripts.

One thing you should determine is

a)      Has jQuery already been added to all your SharePoint pages (by an administrator adding them into a custom master page)? If so then you should remove the jQuery reference from these examples as there is no point in including it twice.

b)      These jQuery files are loaded from Googles CDN servers. If you don’t have external internet access you will have to copy jQuery to some other location (such as a document library).

Show me the examples already!

Download and unpack these zip files – inside you will see

.htm files that you can experiment with.

Open them in a browser to see what they look like. Open them in a text editor like Notepad to change how they look and then re-load in the browser (F5).

.js.txt files that you can use in SharePoint.

Use a text editor to copy the changes you’ve made in the example .htm file in and then add them to the page that you have PivotPoint on using any of the methods in “Adding JavaScript to a page”.

The two examples are :-

Highlighting PivotPoint cells based on the value

The first example we’re going to look at is to highlight different cells depending on the value that’s in them.

For our example –

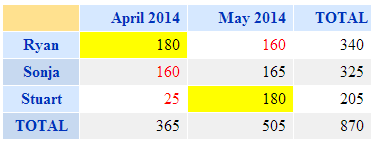
  • If it’s less than or equal to 160 then we want the text in red
  • If it’s more than or equal to 180 then it should have a background in yellow.

The result should be a web part like this.
highlight-by-cell-value

There are plenty of comments in the JavaScript source code but basically what it’s doing Is looping through each cell in the PivotTable, checking what value It is and applying a CSS style.

See the source of highlight-by-cell-value.html and highlight-by-cell-value.js.txt in the ZIP file


Highlighting PivotPoint based on the row and column

In this example we’re looking to highlight a cell based on what Row and Column it appears in.

E.g. in this risk matrix we want to highlight the “High Risk” and “Frequent Probability” in red.

risk-matrix

There are two ways to do this in the javascript example given.

The first is to highlight based on the position, e.g.

highlightCellByIndex(0,0,'background','red');

Will highlight the cell in column 0, row 0 by setting the background red. (Yes sorry, the rows and columns start from number 0!).

But – if the layout of your table changes in future (e.g. someone adds a “Super Extra High Risk”) column) then everything will move and this will be in the wrong place.

In that case the better way is to highlight by the value of the Column and Row headers – e.g.

highlightCell("Rare","Low", 'background','red');

See the source of highlight-by-column-and-row.html and highlight-by-column-and-row.js in the ZIP file

Tips –

  • When making changes to the javascript do a small amount at a time, then you will know where to start if this doesn’t work!
  • You’re not just limited to setting colours, you can also add in any other effect possible in CSS.
  • Use the developer toolbar (F12 in IE and Chrome) if you have an error – this tool will enable you to track it down, but how to use it is beyond the scope of what we can show here!
.css('font-weight','bold');
.css('font-size','200%');
.css('border','1px solid red');
  • You can also add images (e.g. flags)
.append("<img src='some-url-to-an–icon.gif'>");


Disclaimer – these technique is provided as is and free of charge to get you started. You will need some experience of JavaScript or programming and the browser developer tools to modify these to do exactly what you want. Whilst we can’t provide technical support for this we will endeavour to help customers with active Premium Support and Maintenance contracts in place for PivotPoint.


Turn A SharePoint Task List Into A Task Master

Date:October 19th, 2012 Author: Tags: , , , , , ,
Category: FilterPoint Web Part, Highlighter, PivotPoint Web Part, SharePoint Alert, SharePoint Planner, SharePoint Reminder, SharePoint webparts Comments:0 ;

Here’s how you can turn SharePoint’s built-in Task list into a powerful task tracking tool, using Pentalogic products.

These are just examples to get you started – we’re only scratching the surface here of what’s possible with our range of flexible SharePoint web parts.

To start, just create a new blank site and add a task list. Here’s one I made earlier:

start

Now just follow our guide for each section (or just the sections you want):

Each section has step-by-step instructions and a screenshot of the configuration to compare against.

Task list: Priority and Due Date highlighting

Uses Highlighter

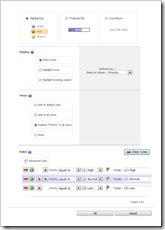
To make the high-priority and upcoming tasks really stand out, we’re going to add a couple of highlighter columns.

Here’s what you will see on the All Tasks view – coloured flags to show priority, a column showing how long we’ve got left to complete items and a red highlight for things that are overdue.

highlighter_result

hl_priority

Highlight Priority

  • Create a new Pentalogic Highlighter column
  • Name the column Task Priority
  • Choose the column type Highlighting
  • Choose Show Icons
  • Click the Default icon, then click Clear
  • Change Base on column to Priority
  • Select Replace ‘Priority’ on all views
  • Under Rules click the Auto-create button
  • Click OK

Due Date Countdown

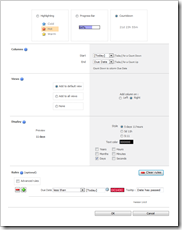
    • Create a new Pentalogic Highlighter column
    • hl_countdownName the column Due
    • Choose the column type Countdown
    • Change the Start option to [Today]
    • Change the End option to Due Date
    • Select Add to default view, on the Right
    • Uncheck all the display options except Days
    • Under Rules click the Auto-create button

Home page: Task calendar overview and summary

Uses Planner

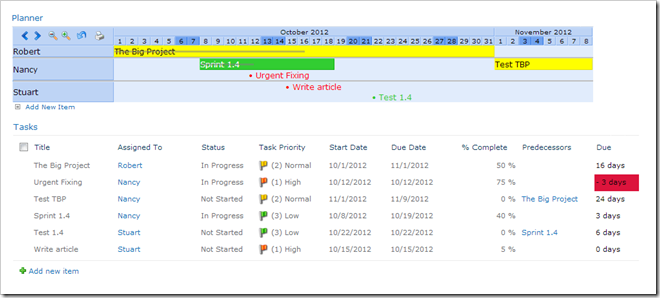
On your site’s home page we’re going to add an at-a-glance overview of your tasks: A view of the task list (highlighted, if you did the previous section) and a task calendar.

Here’s what your home page will look like once we’ve finished:

mainpage

List view

  • Edit the page and add Tasks from the Existing Lists category
  • Edit the web part
  • Change the Selected view to All Tasks (to ensure Highlighter columns are displayed)
  • Click OK

Task calendarplanner_config

  • Edit the page and add Planner v2 from the Miscellaneous category
  • Set the Style to By Category
  • Set the Planner Source to Tasks
  • Set the Start Date to the column Start Date
  • Set the End Date to the column Due Date
  • Set the Category to Assigned To
  • Set the Label to Title
  • Set the Progress to % Complete
  • Set the Period to Auto
  • Change Set colour by column to Priority
  • Assign appropriate Colors to the priorities (e.g. High – Red)
  • Optional: Set a Fxed width under the Appearance section
  • Optional: Set the Font size to Medium

Analysis page: Graphs and granular reporting

Uses FilterPoint and PivotPoint

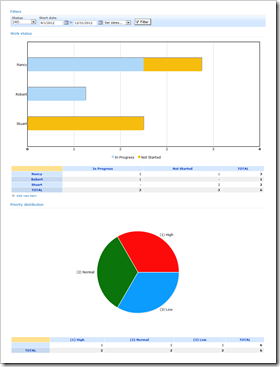
Now we’re going to create an Analysis page to produce some graphs and reporting data from your task list.

You will have an Analysis page that looks like this – showing  charts for each persons workload.

analysispage

Creating the page

  • From Site Actions choose New Document Library (to put the page in)
  • Call the library Pages
  • Set Quick Launch to Yes
  • Set Versioning to No
  • Change the Document Template to Web Part Page
  • Click Create
  • From Site Actions choose More options…
  • Under Page choose Web Part Page
  • Call the page Analysis
  • Change the Template to Full page, Vertical
  • Set the Document Library to Pagespivotpoint_pie_config

Graph and Report: Priority skew

Let’s add a graph to show us if tasks are being raised too often as “High priority”:

  • Edit the Analysis page
  • Add the PivotPoint web part from the Pentalogic.net category
  • Edit the web part
  • Set Display to Both
  • Set List to Tasks
  • Under Columns set Field to Priority
  • Under Chart options set Chart type to Pie
  • Click OK

Graph and Report: Status by Personpivotpoint_stack_config

Next we’ll add a graph to show the status of tasks assigned to everyone. That’ll show us if we have any bottlenecks in the team:

  • Edit the Analysis page
  • Add the PivotPoint web part from the Pentalogic.net category
  • Edit the web part
  • Set Display to Both
  • Set List to Tasks
  • Under Columns set Field to Status
  • Under Rows set Field to Assigned To
  • Under Chart options set Chart type to Bar
  • Set Color mappings to Automatic colors
  • Click OK

Filteringfilterpoint_config

Lastly, let’s add a filtering web part. this will allow us to drill down into our data by selecting certain statuses and date ranges:

  • Edit the Analysis page
  • Add the FilterPoint web part from the Pentalogic.net category
  • Connect the other web parts via the menu (Connections -> Provide filter to)
  • Edit the web part
  • Under Filters click New
  • Change the Label to Status
  • Set the Style to Drop Down
  • Under Get the filter values select From a list
  • Still under Get the filter values, the list Tasks and field Status
  • Under Filters click New
  • Change the Label to Start Date
  • Set the Style to Date Range
  • Set the Field name to From the connected web part and select Start Date
  • Click OK

You can display the page on the Quick Launch menu via Site Actions -> Site Settings and selecting the Quick Launch option under Look and Feel.

Alert page: Configure “Overdue” alerts

Uses Reminder

The last step is to configure Reminder to send email alerts to us when tasks are overdue. You’ll need to create the Pages document library if you skipped the previous section, and then continue with the instructions:

  • From Site Actions choose More options… reminder_config
  • Under Page choose Web Part Page
  • Call the page Reminder
  • Change the Template to Full page, Vertical
  • Set the Document Library to Pages
  • Edit the page
  • Add the Reminder web part from the Miscellaneous category
  • Edit the web part
  • Set Watch list to Tasks
  • Under Email to select Assigned To from the dropdown
  • Under Email CC enter the manager’s e-mail address in the text box
  • Next to Subject click “” and enter the following into the popup box:Overdue task ([Title])
  • Next to Message click “” and enter the following:This task is overdue: Title: [Title]
    Due date: [Due Date]
    Priority: [Priority]
  • Under Send When expand Overdue and choose by 1 Days
  • Click OK

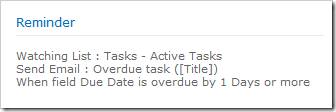
You should hen see the following on the page:

reminderpage

You can also setup email alerts to remind you when tasks are due in a few days.

Finished!

Your mundane Tasks list is now an all-singing all-dancing Task Master!

This is just one example of the many possible solutions that can be achieved with our products. Please feel free to browse the product pages below to learn more or take advantage of our 30 day free trial:

Highlighter 1.6: More options, less buttons

Date:October 9th, 2012 Author: Tags: , , ,
Category: Highlighter Comments:0 ;

The next version of SharePoint Highlighter has been released, now with more options and less buttons:

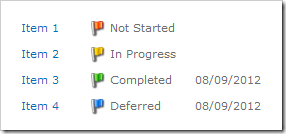
Color category

hl16cc

If you liked Highlighter’s icons, but still wanted to see the column values as well –  now you can!

This is now the default for Icon-based highlighter columns (existing columns will remain unchanged). You can pick and choose which you’d like to see simply by customizing your rules.

New color picker

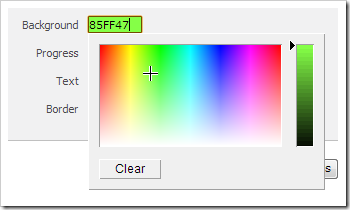
hl16cp

Now you can pick colors faster and with greater flexibility, using our new color picker (courtesy of JSColor).

More icons

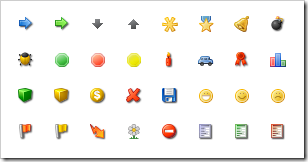
hl16i

Now even more choice of icons. Above are just a few you can use to make your lists stand out. These include a select few from the famous FamFamFam Silk icon set.

Want more icons? See the “How do I add more icon to the picker” section here: Highlighter Manual: Icon Picker

To upgrade

To upgrade to the latest version without losing any settings simply download and install the latest version.

SharePoint Highlighter v1.5: If wishes were trees

Date:November 22nd, 2011 Author: Tags: , , ,
Category: Highlighter Comments:0 ;

Since SharePoint Highlighter’s release in May we’ve had some great suggestions and requests for features and improvements; one of the more surprising was the request for performance enhancements for those with 20 or more Highlighter columns in a view (and really big screens, no doubt).

Although we’ve added odds and ends during other projects, the Highlighter wishlist has steadily grown; fed by the suggestions from its growing user base and our own drive for continuous improvement.

So while TeamTime was being tested and prepared for beta, we stroked our collective beards (it is Movember after all) and decided to clear it down. Here are some highlights:

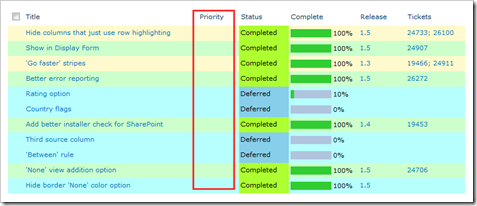
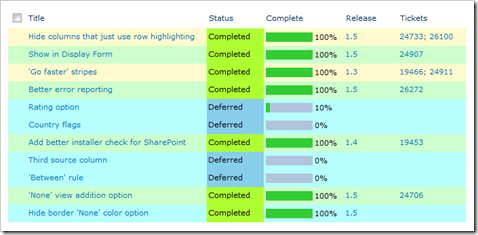
  • Row highlighting columns hide themselves
  • Highlighter displays on View Item form
  • Lookup columns now supported

Hidden Row Highlighting Columns

If you have a Highlighter column which displays Row Highlighting you’ll no doubt have noticed that the empty Highlighter column has to be visible on the page on order for the highlighting to work:

v1_5_rh_a

In Highlighter v1.5 the column will automatically hide itself from the page if it is only used for Row Highlighting:

v1_5_rh_b

View Item Form Display

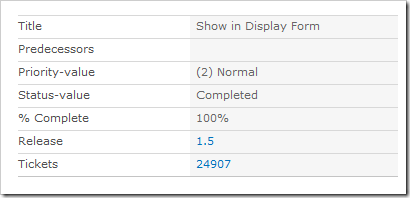
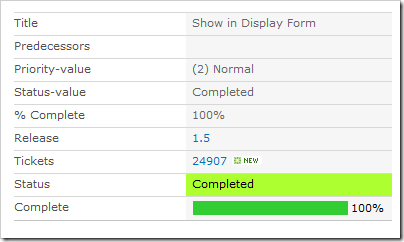
Previously Highlighter columns would not display on the View Item form (or customized versions of it):

v1_5_df_a

Highlighter columns will now display on this form, with the exception of those used only for row highlighting (which will be hidden entirely):

v1_5_df_b

Lookup Columns

You can now use Lookups as source columns, which act in much the same way as Choice columns:

v1_5_lu

Upgrading

Please see the manual for instructions on downloading and upgrading to the latest version of SharePoint Highlighter.

What’s on your wishlist?

The more suggestions we have the better we can make our products. Every feature request is reviewed and added to the product’s wishlist. Once a wishlist hits a certain size, the most popular (and/or the best ideas) are rounded up and herded into the next version.

Contact us at support@pentalogic.net and tell us what’s on your wishlist!

How to do list highlighting in SharePoint

Date:May 11th, 2011 Author: Tags: , , , , , ,
Category: Highlighter, SharePoint Development, SharePoint Free Tools Comments:1 ;

highlight

Lists can often look a little bland, and attempting to impatiently skim read them can often lead to missing important information. This is why a bit of well-placed color can really help users with their day-to-day work.

In my last post How to create a progress bar in SharePoint I covered the various methods of displaying a progress bar on your SharePoint list view. For this article I’m going to do the same for row and cell highlighting, as I’ve spent a rather considerable time wrestling with this particular feature in SharePoint Highlighter:

Client based

  • JavaScript: Put some JavaScript code into a Content Editor Web Part
  • Designer: Use SharePoint Designer to set up Conditional Formatting

Custom Field Type

  • Code it yourself: Make your own custom field type from scratch
  • Buy: Purchase a pre-made solution

JavaScript document_into8

If you need a free solution that doesn’t require farm administrator permissions, then using JavaScript in a Content Editor Web Part may be the solution for you. As always with this method, Christophe at Path to SharePoint has a great example.

Alternatively, there’s a slightly off-topic walkthrough by Boris Gomiunik which avoids having to use an HTML calculated column. It has a great deal of useful information, and would only require minor tweaking to do cell or row coloring instead of text.

The JavaScript and CEWP method should avoid having to trouble your IT department to make the change, which I’m almost certain you’ll both be happy about.

Although you’ll have to implement the CEWP on every page you want the highlighting to display (which may cause your view drop-down to disappear), you may not have to copy the full JavaScript into every CEWP, as discussed in my previous article’s comments.

Designer designer30

If you’re lucky enough to have a generous (or inattentive) IT department, you may be able to use SharePoint Designer; a free tool from Microsoft. SharePoint Designer allows you to add Conditional Formatting to your list views in a manner very similar to Excel. This has to be added to each of the views you want to see the highlighting on.

You’ll need a little time to become familiar with Designer, and to set it up for your needs, but once you have done so it can be a powerful tool. Unfortunately it is often regarded by administrators as a dangerous tool for this very reason.

There’s a useful step-by-step guide to setting up conditional formatting in SPD 2010 by Frederique Harmsze at Macaw, and a more straight-laced 2007 version on the Microsoft Office site.

Code studio6

Creating a custom field type to perform highlighting on a list view is in many ways like trying to type on a keyboard on the other side of a crowded the room with a pole (which sometimes gets stolen by the janitor if you leave it out overnight). That might be a slight exaggeration, but it is very awkward.

This is mostly because there is no way to programmatically interact with the row and cell color from server-side code (the distance across the room in my analogy). So you’ll need to get JavaScript onto the page in order to do the highlighting (the metaphorical pole).

The crowd represents SharePoint’s own JavaScript (all 0.5MB of it), which may interfere with yours; an example of this would be the use of AJAX to render Group By views.

Finally, SharePoint seems to passive-aggressively object to script elements, and silently removes them from HTML text stored in the database; the metaphorical janitor. This can be worked around by rendering using XSL (in 2010) or CAML (in 2007).

Buy currency_dollar4

If you want to avoid the unpredictable cost of time spent creating a solution, then you’re better off paying the money up front for a pre-made solution. As a bonus it won’t be you that has to test it to death or maintain and support it.

By some enormous coincidence, we happen to have recently released a product called SharePoint Highlighter that can do this kind of highlighting very easily. Of course, there are other similar products on the market, which we’ve listed on this handy comparison matrix.