Here’s how you can turn SharePoint’s built-in Task list into a powerful task tracking tool, using Pentalogic products.
These are just examples to get you started – we’re only scratching the surface here of what’s possible with our range of flexible SharePoint web parts.
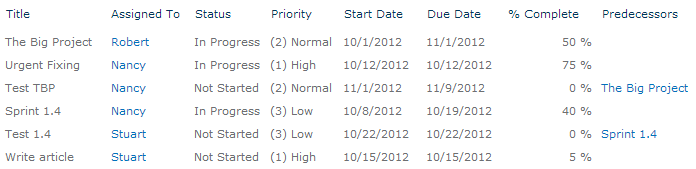
To start, just create a new blank site and add a task list. Here’s one I made earlier:
Now just follow our guide for each section (or just the sections you want):
- Task list: Priority and Due Date highlighting (uses Highlighter)
- Home page: Task calendar overview and summary (uses Planner)
- Analysis page: Dashboards, graphs and reporting (uses FilterPoint and PivotPoint)
- Alert page: Configure “Task Overdue” email alerts (uses Reminder)
Each section has step-by-step instructions and a screenshot of the configuration to compare against.
Task list: Priority and Due Date highlighting
Uses Highlighter
To make the high-priority and upcoming tasks really stand out, we’re going to add a couple of highlighter columns.
Here’s what you will see on the All Tasks view – coloured flags to show priority, a column showing how long we’ve got left to complete items and a red highlight for things that are overdue.

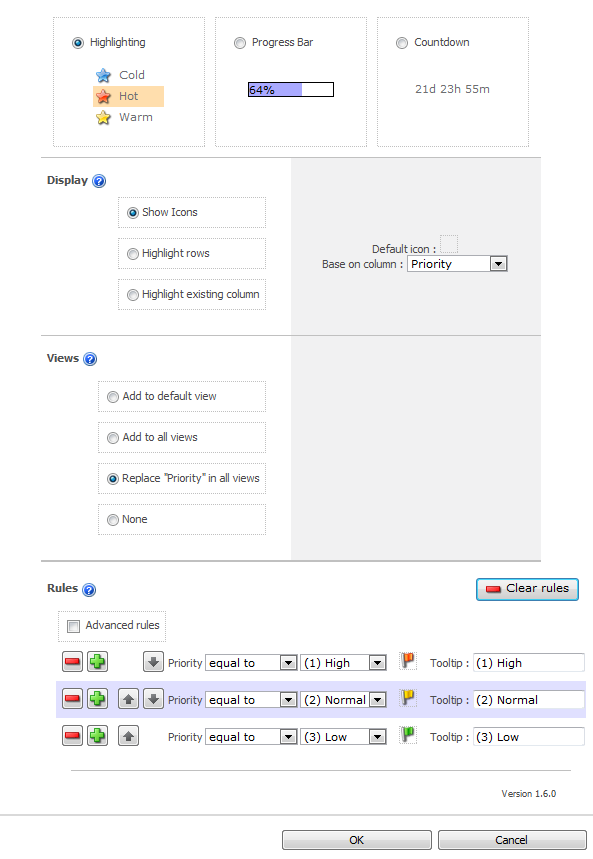
Highlight Priority
- Create a new Pentalogic Highlighter column
- Name the column Task Priority
- Choose the column type Highlighting
- Choose Show Icons
- Click the Default icon, then click Clear
- Change Base on column to Priority
- Select Replace ‘Priority’ on all views
- Under Rules click the Auto-create button
- Click OK
Due Date Countdown
- Create a new Pentalogic Highlighter column
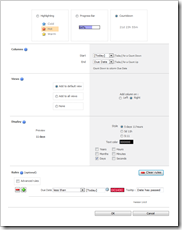 Name the column Due
- Choose the column type Countdown
- Change the Start option to [Today]
- Change the End option to Due Date
- Select Add to default view, on the Right
- Uncheck all the display options except Days
- Under Rules click the Auto-create button
 Name the column Due
Home page: Task calendar overview and summary
Uses Planner
On your site’s home page we’re going to add an at-a-glance overview of your tasks: A view of the task list (highlighted, if you did the previous section) and a task calendar.
Here’s what your home page will look like once we’ve finished:
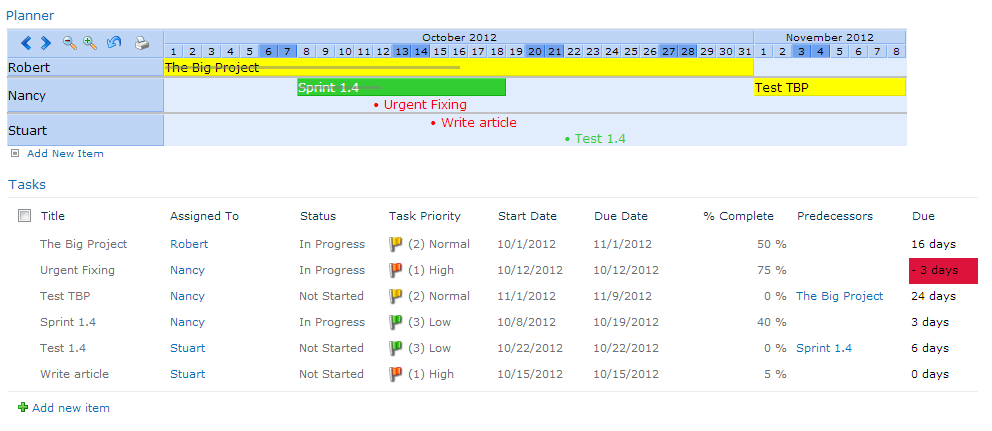
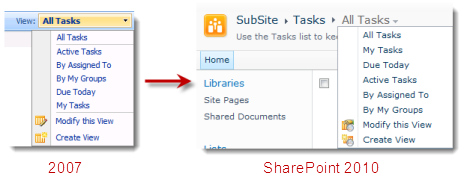
List view
- Edit the page and add Tasks from the Existing Lists category
- Edit the web part
- Change the Selected view to All Tasks (to ensure Highlighter columns are displayed)
- Click OK
Task calendar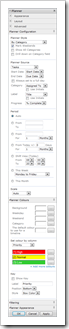

- Edit the page and add Planner v2 from the Miscellaneous category
- Set the Style to By Category
- Set the Planner Source to Tasks
- Set the Start Date to the column Start Date
- Set the End Date to the column Due Date
- Set the Category to Assigned To
- Set the Label to Title
- Set the Progress to % Complete
- Set the Period to Auto
- Change Set colour by column to Priority
- Assign appropriate Colors to the priorities (e.g. High – Red)
- Optional: Set a Fxed width under the Appearance section
- Optional: Set the Font size to Medium
Analysis page: Graphs and granular reporting
Uses FilterPoint and PivotPoint
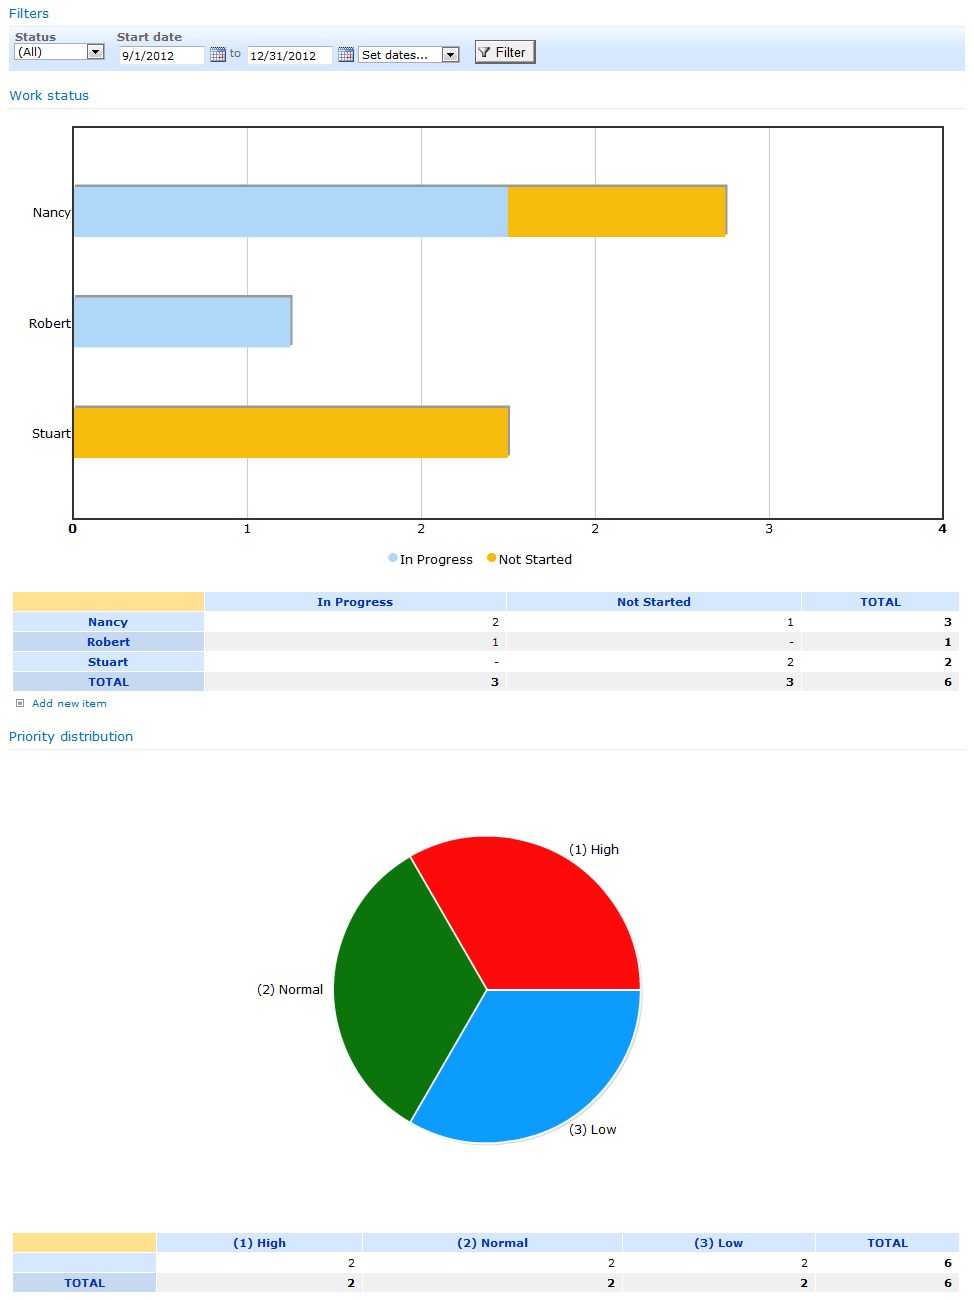
Now we’re going to create an Analysis page to produce some graphs and reporting data from your task list.
You will have an Analysis page that looks like this – showing charts for each persons workload.
Creating the page
- From Site Actions choose New Document Library (to put the page in)
- Call the library Pages
- Set Quick Launch to Yes
- Set Versioning to No
- Change the Document Template to Web Part Page
- Click Create
- From Site Actions choose More options…
- Under Page choose Web Part Page
- Call the page Analysis
- Change the Template to Full page, Vertical
- Set the Document Library to Pages

Graph and Report: Priority skew
Let’s add a graph to show us if tasks are being raised too often as “High priority”:
- Edit the Analysis page
- Add the PivotPoint web part from the Pentalogic.net category
- Edit the web part
- Set Display to Both
- Set List to Tasks
- Under Columns set Field to Priority
- Under Chart options set Chart type to Pie
- Click OK
Graph and Report: Status by Person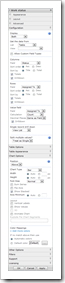

Next we’ll add a graph to show the status of tasks assigned to everyone. That’ll show us if we have any bottlenecks in the team:
- Edit the Analysis page
- Add the PivotPoint web part from the Pentalogic.net category
- Edit the web part
- Set Display to Both
- Set List to Tasks
- Under Columns set Field to Status
- Under Rows set Field to Assigned To
- Under Chart options set Chart type to Bar
- Set Color mappings to Automatic colors
- Click OK
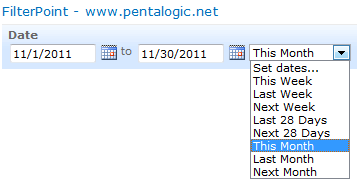
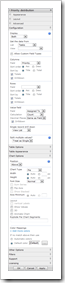
Filtering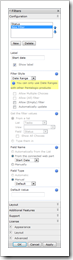
Lastly, let’s add a filtering web part. this will allow us to drill down into our data by selecting certain statuses and date ranges:
- Edit the Analysis page
- Add the FilterPoint web part from the Pentalogic.net category
- Connect the other web parts via the menu (Connections -> Provide filter to)
- Edit the web part
- Under Filters click New
- Change the Label to Status
- Set the Style to Drop Down
- Under Get the filter values select From a list
- Still under Get the filter values, the list Tasks and field Status
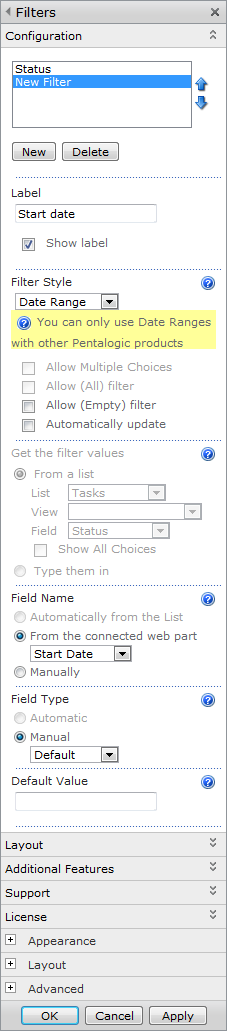
- Under Filters click New
- Change the Label to Start Date
- Set the Style to Date Range
- Set the Field name to From the connected web part and select Start Date
- Click OK
You can display the page on the Quick Launch menu via Site Actions -> Site Settings and selecting the Quick Launch option under Look and Feel.
Alert page: Configure “Overdue” alerts
Uses Reminder
The last step is to configure Reminder to send email alerts to us when tasks are overdue. You’ll need to create the Pages document library if you skipped the previous section, and then continue with the instructions:
- From Site Actions choose More options…
- Under Page choose Web Part Page
- Call the page Reminder
- Change the Template to Full page, Vertical
- Set the Document Library to Pages
- Edit the page
- Add the Reminder web part from the Miscellaneous category
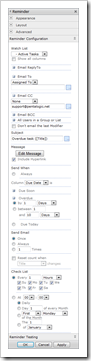
- Edit the web part
- Set Watch list to Tasks
- Under Email to select Assigned To from the dropdown
- Under Email CC enter the manager’s e-mail address in the text box
- Next to Subject click “…” and enter the following into the popup box:Overdue task ([Title])
- Next to Message click “…” and enter the following:This task is overdue: Title: [Title]
Due date: [Due Date]
Priority: [Priority] - Under Send When expand Overdue and choose by 1 Days
- Click OK

You should hen see the following on the page:
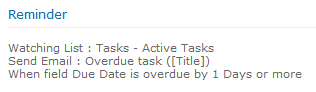
You can also setup email alerts to remind you when tasks are due in a few days.
Finished!
Your mundane Tasks list is now an all-singing all-dancing Task Master!
This is just one example of the many possible solutions that can be achieved with our products. Please feel free to browse the product pages below to learn more or take advantage of our 30 day free trial: