Posts Tagged ‘Tip’

SharePoint Staff Vacation Planner – DIY Guide part 5 – the system in action and Out of the box options.

Date:August 9th, 2010 Author: Tags: , ,
Category: PivotPoint Web Part, SharePoint Ideas, SharePoint Planner, SharePoint Reminder, SharePoint webparts Comments:0 ;

This is Part 5 of the SharePoint Staff Vacation Planner – DIY Guide

See the System In Action

So, now let’s reap the rewards for all of our hard work and see the system in action.

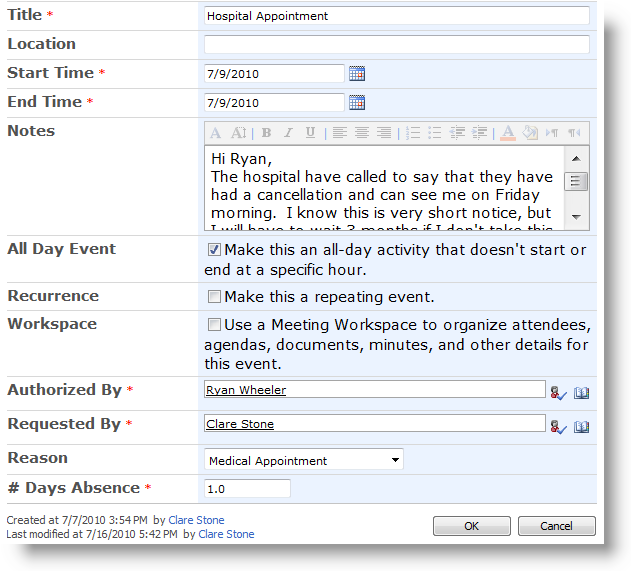
I need to book a day off for a hospital appointment on Friday 9th of July.  I can see all the absence bookings for my department and the number of days I have had off this year on the absence dashboards above. I’ve only had 1 day off for Medical Appointments so far this year and I am allowed 3 so that’s fine – but 3 people are off on that day already, it’s going to be tough, but I really need to go to that appointment.

So, as you can see, I can add a new item to the planner straight from the link in the webpart, I don’t need to go to the list.

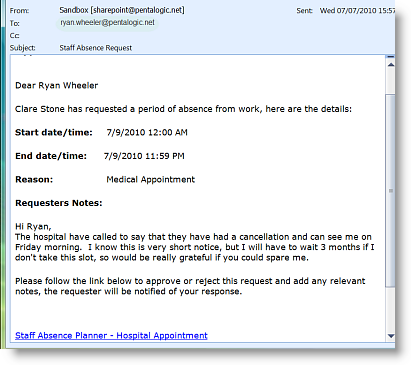
Ryan receives the absence request email and from looking at his dashboards he can see that although I am well within my Medical Appointments entitlement approving this absence is going to leave him really short staffed on Friday – but he can’t face the thought of listening to me moaning about my in-growing toenail for another 3 months, so he approves the request.

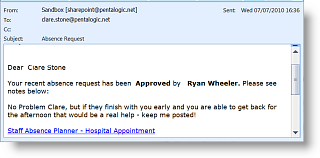
Once the request is approved I get an email notifying me, and the status of the absence changes from “pending” to “approved” on the absence planner.

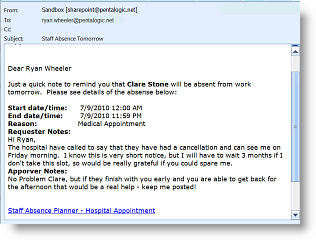
And for the final step in the process, is the email to Ryan on Thursday, to remind him that I am off the next day, giving him chance to make sure all my work is covered.

So now we should have no excuse for messing up staff absence planning ever again!

So Can’t I do this with SharePoint out of the Box?

Well some of it. Clearly, your basic list and filtered views are all set up in SharePoint out of the box.

When it comes to your dashboard views there are some limitations.

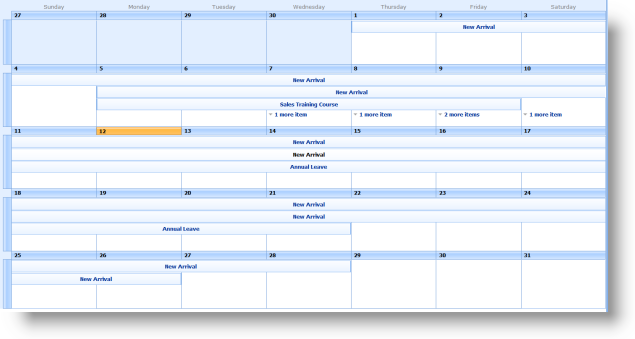
This is how your Vacation Planner Wall Chart looks out of the box:

or as a Gantt view:

We have lost all of our color coding, it’s not possible to show the name of the person who is absent, unless you make this the title of the event, and we have no way of distinguishing between approved and pending items.

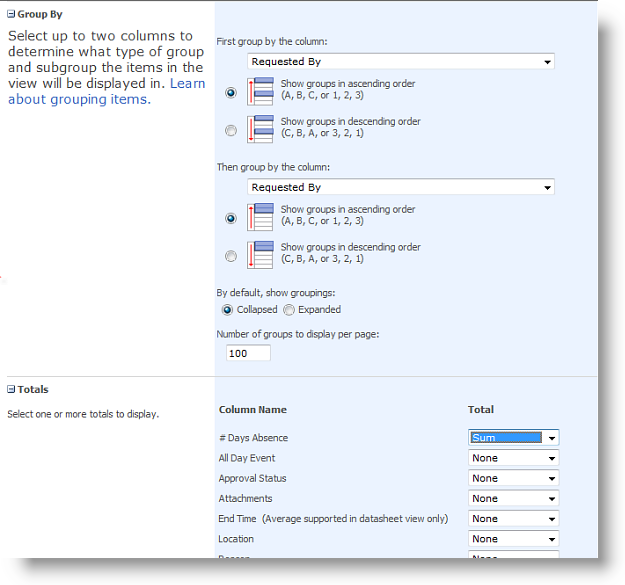
For the “Absences to Date” and “My Absences” dashboards we can achieve something similar, if a bit clunky, out of the box.  From the settings tab in your Staff Absence Planner list, choose edit current view.

Head down to Group By and choose Requested By and Reason.  Then expand the Totals section and choose # Days Absence and sum.


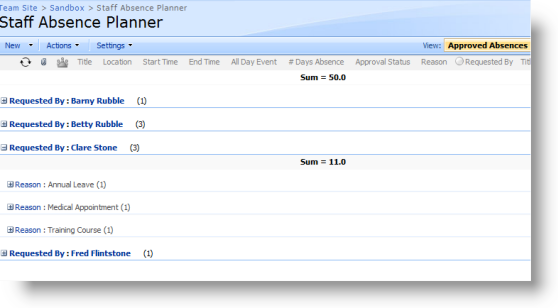
This will give you a view like this:

The information is all there, but I have to work to get at it.  For example Ryan can see that I have had 11 days off this year, covering 3 separate occasions, but he is going to have to drill into each individual event and get his calculator out to figure out how many of my days off have been annual leave, training or Medical.

Then on to the workflow emails. It is possible to generate email alerts for the absence request and the request approval, but the solution isn’t perfect.  For absence requests an administrator can set the list up to email all line managers within your company or department, every time a new request is added to the list.  This means that managers will get absence requests from their own staff, but also from all other staff as well.  The only way to avoid this would be to set up a separate absence request list for each line manager.

For the request approved/rejected email the requester will need to set up an alert on each request as they create it, asking to be alerted any time anything changes on that list item.

When the alert emails arrive, this is how they look:
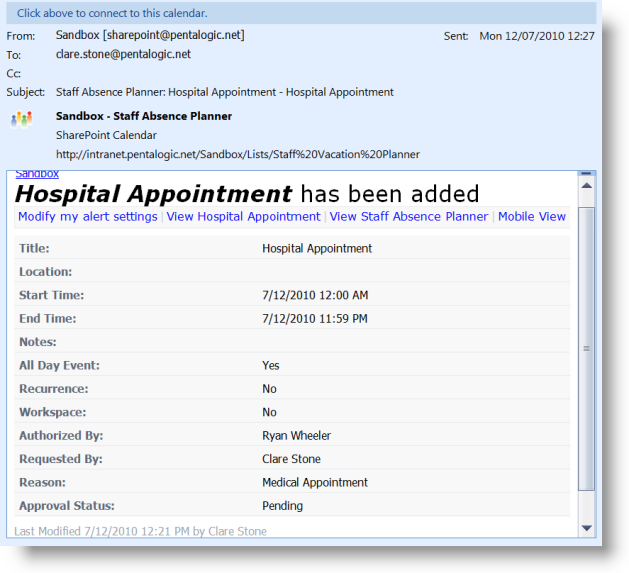
There is no way to edit the email, and give the recipient clues on what they are supposed to do with it.

The final “John Smith is off work tomorrow” email, cannot be generated in SharePoint out of the box, as it doesn’t do date based alerts.

You could do this with Workflow and Event Receivers, but that means having some technical knowledge and breaking out SharePoint Designer and/or Visual Studio.

So – can you build a staff absence planning system with SharePoint out of the box?  I guess the answer is “kind of”. It is possible to build a basic system but it’s going to lack some useful functionality and may now be enormously user friendly.

We hope you’ve found this useful.

If you would like to try the Vacation planning system you can download a 30 day free trial version here.

And as always, if you have any questions or comments, we would love to hear them.

How to edit List forms in SharePoint 2010

Date:July 29th, 2010 Author: Tags: , ,
Category: General, SharePoint Ideas Comments:8 ;

In SharePoint 2007 there is a well known trick for opening up a list’s forms (New/View/Edit) in design mode – append ?ToolpaneView=2 onto the url – this is often used to add instructions or javascript using a Content Editor Web Part (CEWP) e.g.

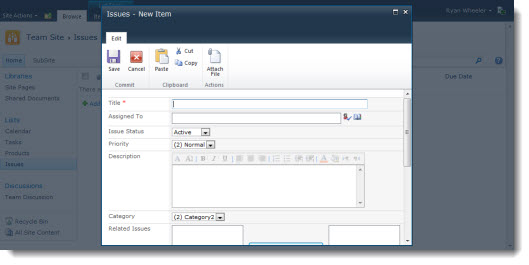
However when I first tried to use my tried and tested shortcut in SharePoint 2010 I came a little unstuck as now the New/View/Edit forms appear in a fake popup window and modifying the URL doesn’t work.

There are two ways to do this in SharePoint 2010 – and once you know where to find them they should actually make life that little bit easier.

The first is to open up the form in a new window and then add ToolpaneView=2 onto the end of the URL, so

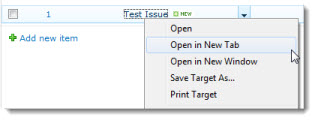
Right click on Add new Item or the lists Title field and select Open in New Tab or hold down CTRL while left clicking.

Alternatively you can do this using the new-fangled ribbon toolbar – select under List Tools the List tab, then on the right hand side of the ribbon you should see an icon for Form Web Parts which gives a menu of the different forms associated with the list that you can edit.


Showing the records ID on the View and Edit forms

Date:July 23rd, 2010 Author: Tags: , ,
Category: SharePoint Ideas Comments:37 ;

SharePoint - Modify View and show ID column

ID’s are a convenient, often short, way to uniquely refer to something. Unless you’re the Tax man who seems to believe he can’t get through his day without giving me, thats just one person, 7 unique id’s – presumably one for each extremity that he would like a piece off…

I digress… ID’s – SharePoint uses an ID for each item in a list and sometimes its handy to know them “Ere Bob – have you done task 1234 yet?”

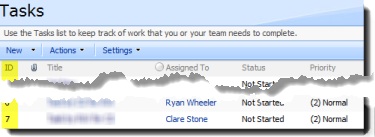
You can easily add them to the list view (Modify this View then find the ID column, click display)

SharePoint - view with ID column

But what about if you want to see this on the View and Edit forms? (You can’t see it on the New form as it doesn’t get an ID assigned until you’ve created it)

You can’t do this in the UI. You can create a custom View/Edit form using SharePoint designer but its quite complex, is a pain when we add new fields and its fraught with potential problems.

So instead we’re going to look into every ones favourite SharePoint UI hacking tools – the Content Editor Web Part (CEWP) and javascript/jQuery.

(more…)

SharePoint Calculated columns – Adding hours onto a date field

Date:May 18th, 2010 Author: Tags: , , ,
Category: General, SharePoint Ideas Comments:10 ;

A customer recently contacted me with an interesting question.

They were using a SharePoint task list to help schedule jobs for field engineers but rather than have a Start Date and End Date field they wanted to have a Start Date and Duration field and automatically work out the End Date.

So End Date = Start Date + Duration

They were then planning to display this using Planner in the By Category view which is idea for resource booking as it makes it easy to see when a resource is booked or free (SharePoints built in gantt chart can’t do this swimlane style of view and doesn’t support using calculated columns).

Now this is easy to do if the Duration is specified in days – in fact you just use the equation above – but what if Duration is in hours or minutes?

First port of call is this page from Microsoft showing examples of common date time formula you can use in SharePoint calculated columns hmmm, adding days OK… adding months Check… adding years OK too….but nothing about hours. Back to the drawing board.

(more…)

Use SharePoint Filtered Views to Stop Sending Alerts to Yourself

Date:April 19th, 2010 Author: Tags: , , , ,
Category: Filter, General, SharePoint Alert, SharePoint Ideas Comments:0 ;

How annoying is it when you have just created or amended an item in SharePoint, and you immediately get an Alert email about it?

You know the kind of situation: you might be working in a team list, you have the list set up to alert you when an item assigned to you is added or amended, so as soon as you add or amend an item yourself an alert email pings through to your inbox. Completely unnecessary inbox clutter.

So, lets switch off those annoying “alerts to myself” – has to be an easy one click operation, right?

(more…)

SharePoint Alerts not working?

Date:December 2nd, 2009 Author: Tags: , ,
Category: General, SharePoint Alert, SharePoint Ideas Comments:1 ;

This is one of the most common questions posed in SharePoint forums.

SharePoint built in Alerts are one of the best used features of the system – but also one of the most problematic. There are just so many different ways they can go wrong! And when they do go wrong the internet advice available on how to put them right is very fragmented and often confusing. All manner of suggestions come up – many of then not appropriate to the particular problem the user is having.

(more…)

How To Use Filters in SharePoint to show items in the current Calendar Month

Date:November 26th, 2009 Author: Tags: , , ,
Category: Calculated Columns, Filter, SharePoint Ideas Comments:209 ;

Its very easy using the Filter feature of SharePoint views to show only items completed in the last 30 days or items due in the next X days; for example :-

Completed >= [Today]-30

On the Advanced SharePoint View and Filter techniques post Ed asked how you could filter for the current calendar month rather than a rolling 30 day period (for example all tasks due this calendar month).

Like all great questions it seemed simple enough – something like only showing items where the Month and Year of the due date = the Month and Year of the current date.

(more…)

Tip – Sending an SharePoint email Alert when a Task is completed

Date:October 16th, 2009 Author: Tags: , , , ,
Category: Filter, SharePoint Alert, SharePoint Reminder, SharePoint webparts Comments:0 ;

Victor from New York asked

Is there a way to configure a Reminder webpart to send an email when task item status in the task list is set to “completed”?

Sure there is!

In this case the trick is to use a SharePoint Views to filter out the tasks you are interested in.

(more…)

Tip – don’t send SharePoint email alerts for old items.

Date:October 16th, 2009 Author: Tags: , , ,
Category: Filter, SharePoint Alert, SharePoint Reminder, SharePoint webparts Comments:0 ;

There are some scenarios where you could setup Reminder to generate emails alerts in a simple workflow scenario such as such as when a Task is completed,  a helpdesk ticket is closed, a company announcement is made, a vacation request or expenses claim is approved and so on.

When you first set up this kind of reminder, an email alert for any records already in this state (e.g. completed tasks) will also be sent and some of these could be quite old, so you could end up sending quite a lot of “old” reminder emails.

If you want to avoid sending emails for these old records you have 2 options:


  • Use the Redirect Emails function to redirect the emails to yourself the first time its ran, delete these and then remove the redirect

This also gives you the opportunity to double check that everything is setup correctly.

  • Use a view to filter out old records

For example you could filter to show only records with an ID > a recent ID.

Or you could add filter to show only records Created after a certain date.

Tip – All records in SharePoint have an ID and its sequential and automatically generated. To find the id you can show the ID column in your view or see the ID in the URL in your browser address bar.


SharePoint Reminder Webpart Free Trial Dowmload


Filterpoint Download

Tip – Showing multiple columns in SharePoint Planner Webpart

Date:October 14th, 2009 Author: Tags: , , , , , ,
Category: Calculated Columns, SharePoint Planner, SharePoint webparts Comments:1 ;

There may be times when you want to display timeline or category information from more than one list column in a gantt chart. For example in the chart below we have taken information from the “priority” and “title” columns of a list to populate the category labels.

With Planner you can show multiple columns in the Category or on the Timeline of a Gantt chart by using a calculated column to merge fields together.

concat-columns
For example to merge Priority and Title columns together you would :-


  • From your list click Settings > Create Column
  • Set a name such as “Category”
  • Choose Calculated for the type
  • In formula enter (where [Title] etc is the name of the columns you want to merge)
      =[Priority] & " : " & [Title]
  • Uncheck ‘Add to default view’ checkbox if you don’t want this appearing for the normal list view.
  • In Planner you can now select this column.

You can merge multiple columns together, for example :-

   =[Priority] & " : " & [Title] & " - " & [Assigned To]

You can also use SharePoint standard functions and formula (many similar to excel) such as :-

   =Text([Start Time],"mmm-yyyy") " : " & [Title]

Which would prefix the Title with Month and year, like so  October-2009 : Your title here

To display the the duration in days you could use

   =DATEDIF([Start Time],[End Time],"d") & " Days"

See some more examples of common functions