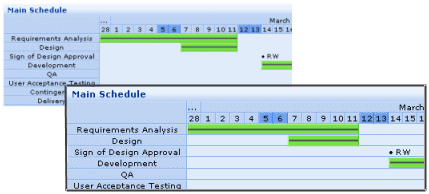
Update – an option to use horizontal gridlines has now been built into version 2.4
Alessandro from Italy contacted us wanting to know if there was a way of adding gridlines to SharePoint Planner so it’s easier to visually connect up the column on the left with the corresponding timeline.
With a few Cascading Style Sheets (CSS) ninja moves you can change the display from something like this.

The following snippet does the trick and can be added to an individual page using a Content Editor Web Part thereby changing just the Planner web parts that appear on that page.
DIV.SharePointPlanner2 TABLE.plgx_Default TR TD
{
border-bottom : 1px solid #B9D1F4;
}
Alternatively you can add it to the SharePointPlanner.css file that all planner web parts use or download one that’s already been edited. There can be multiple copies of this file depending on how you install SharePoint and Planner and they can be in different places so it’s best to do a file search and replace them all.
If you are a CSS Ninja then you can make other changes to the appearance and you will find some helpful comments in the CSS file to guide you.
But remember – if you reinstall or upgrade to a later version of Planer you will lose any changes so do keep a copy of your modified files.
We are considering adding this as an option to the configuration tool part so if you think it would be useful then let us know.
And if you’ve got any other questions or suggestions we would love to hear them!
Tags: gantt, Planner, SharePoint, WebPart


